
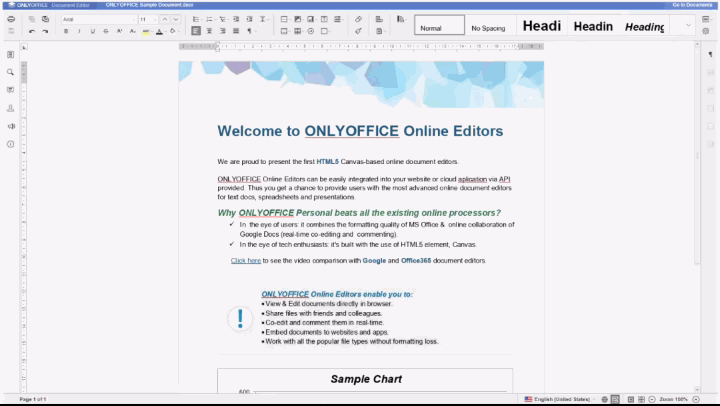
OnlyOffice is a great addition to NextCloud, offering in-browser document viewing, editing and collaboration similar to popular solutions such as Google Drive and Microsoft O365. Of all the modifications I've made to my personal server, this one was the most impactful by far. Let's take a look how to get OnlyOffice setup and running with NextCloud. This article assumes you are running an Ubuntu server, already have NextCloud set up and are using NGINX for your web server. However, the general steps should be fairly similar across platforms.
OnlyOffice Document Server
The first step for getting OnlyOffice running is to spin up the docker container for the document server. This is what provides the core OnlyOffice experience - rendering and serving documents, retaining file history and providing cross-collaboration features. There are a variety of docker flags and configuration you could use, but here's what I find works well for me:
docker run --restart=always --name onlyoffice_vX.Y -i -t -d -p 127.0.0.1:8000:80 onlyoffice/documentserver
This runs the document server, gives it a descriptive name and makes sure it restarts if it ever goes down. It's also worth noting this configuration will not retain document history when the container goes down or is updated to a new version. If you require that, you can mount the volumes on the host as described in the docker documentation linked here.
Serving OnlyOffice
At this stage, the document server is running on port 8000 and only accessible via the host machine. NGINX will be our SSL proxy. Configuration this way allows more flexibility with the document server location and scaling. It also keeps our SSL setup, configuration and management in a single location.
Obtain SSL Certificates
The full process and requirements for generating SSL certificates is beyond the scope of this article, but is pretty straightforward using CertBot and LetsEncrypt. Make sure you have a domain name which points to your server, and then you can install CertBot and get the certificates:
sudo certbot certonly --nginx
The CertBot tool will take you through a few preliminary steps, then dump the certificate files somewhere on your system, usually /etc/letsencrypt/live/domain/. It will also set up an automated cron job to refresh your scripts prior to their expiration. For more information on the various script files, take a look at the README file that gets put in the same directory as the certificates.
NGINX Configuration
The configuration for NGINX is pretty straightforward. You can find the officially recommended configuration for OnlyOffice here. That same repository also holds configurations for a variety of other popular web servers, including Apache and Traefik. At the very least, you'll need to modify the docservice upstream block to change the backendserver-address to the docker address and port. There are also some other changes I made. The full configuration I ended up using was this:
upstream docservice {
  server 127.0.0.1:8000;
}

map $http_host $this_host {
    "" $host;
    default $http_host;
}

map $http_x_forwarded_proto $the_scheme {
     default $http_x_forwarded_proto;
     "" $scheme;
}

map $http_x_forwarded_host $the_host {
    default $http_x_forwarded_host;
    "" $this_host;
}

map $http_upgrade $proxy_connection {
  default upgrade;
  "" close;
}

proxy_set_header Upgrade $http_upgrade;
proxy_set_header Connection $proxy_connection;
proxy_set_header X-Forwarded-Host $the_host;
proxy_set_header X-Forwarded-Proto $the_scheme;
proxy_set_header X-Forwarded-For $proxy_add_x_forwarded_for;

server {
  listen 0.0.0.0:80;
  listen [::]:80 default_server;
  server_name mydocserver.com;
  server_tokens off;

  return 301 https://$server_name:443$request_uri;
}

server {
  listen 0.0.0.0:443 ssl;
  listen [::]:443 ssl default_server;

  server_name mydocserver.com
  server_tokens off;
  root /usr/share/nginx/html;

  ssl on;
  ssl_certificate /etc/letsencrypt/live/mydocserver.com/fullchain.pem;
  ssl_certificate_key /etc/letsencrypt/live/mydocserver.com/privkey.pem;
  ssl_verify_client off;

  ssl_ciphers "EECDH+AESGCM:EDH+AESGCM:AES256+EECDH:AES256+EDH";

  ssl_protocols  TLSv1 TLSv1.1 TLSv1.2;
  ssl_session_cache  builtin:1000  shared:SSL:10m;

  ssl_prefer_server_ciphers   on;

  add_header Strict-Transport-Security "max-age=1209600; includeSubDomains" always;
  add_header X-Content-Type-Options nosniff;

  location / {
    proxy_pass http://docservice;
    proxy_http_version 1.1;
  }
}
The next step is to create a symbolic link to our newly available site:
sudo ln -s /etc/nginx/sites-available/configfile /etc/nginx/sites-enabled/
And then, finally, we can test that our syntax is correct via sudo nginx -t. Assuming we are good, we just need to restart NGINX:
sudo systemctl restart nginx
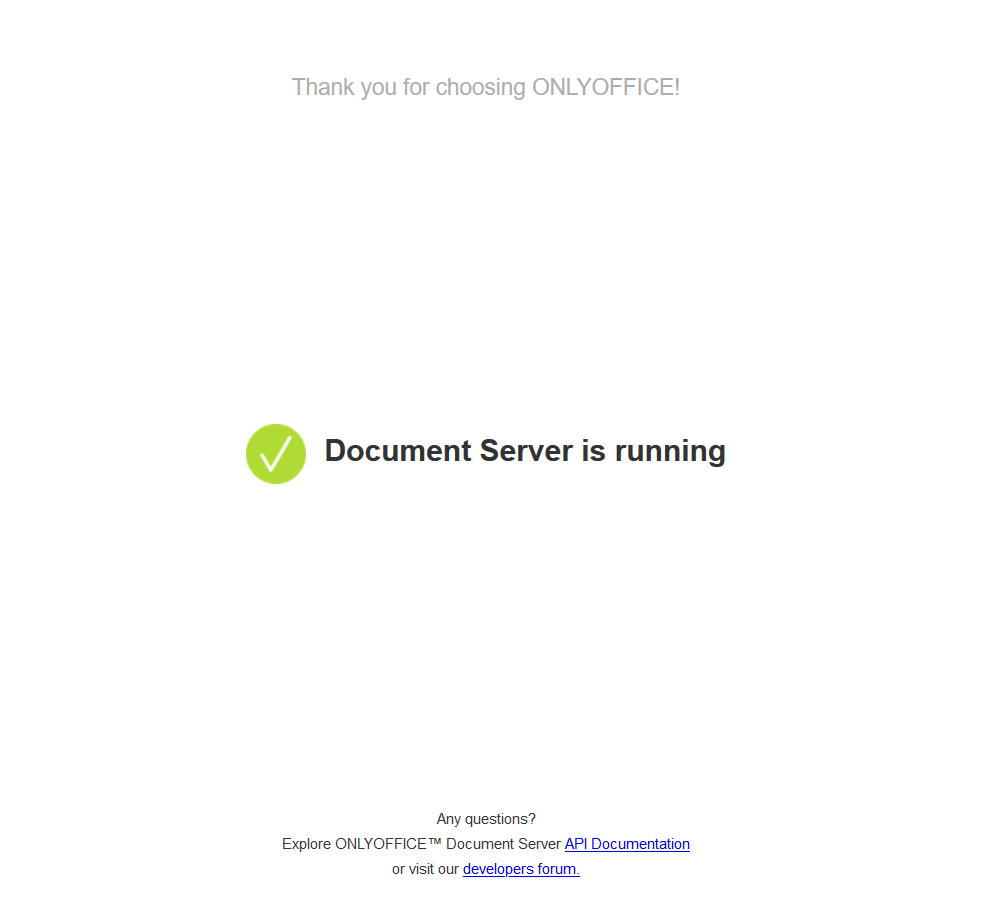
After this, our OnlyOffice document server should be publicly available through SSL. Before testing, you may want to comment out the Strict-Transport-Security header just in case something goes wrong. When you're ready to test, just head to the domain you configured in NGINX. In my case, this would be mydocserver.com. If everything is working smoothly, you should be redirected to an SSL (https) domain and shown a validation message that everything is working:
NextCloud Integration
The final step is to hook up NextCloud to OnlyOffice. This one is pretty easy - firstly, you can install the OnlyOffice plugin by logging into your NextCloud server. Select your profile in the top right, then navigate to the "Apps" section. Search for OnlyOffice and install. After installation, you can navigate to the "Settings" in NextCloud. In the "Administration" subsection, there should be a new option for OnlyOffice present. Here, you should see an input option for "Document Editing Service address," which will be the publicly available address which we just setup in the previous section (mydocserver.com).
To validate everything is working, simply go into the main NextCloud UI and hit the plus sign to create a new file. There should be some new options for Documents, Spreadsheets and Presentations. Select any of them and give the new file a name. The file editor should open in a new broswer editor, where you can make comments, changes, etc. It will save automatically, or you can use the save icon in the upper left to save manually.
Summary
Setting up NextCloud and OnlyOffice is a bit trickier than some other apps or additions, but is really impactful. For those looking to ditch Microsoft or Google suites, it is the most robust and polished experience I've found to date. Additionally, setting up the document server behind an SSL proxy ensure we are secure and scalable. Happy editing!