A while back, I bought myself an Ender 3 Pro and have been having a blast printing and painting figurines. I'll be making a separate post about that in the future, but what I wanted to talk about today was some long-overdue upgrades.

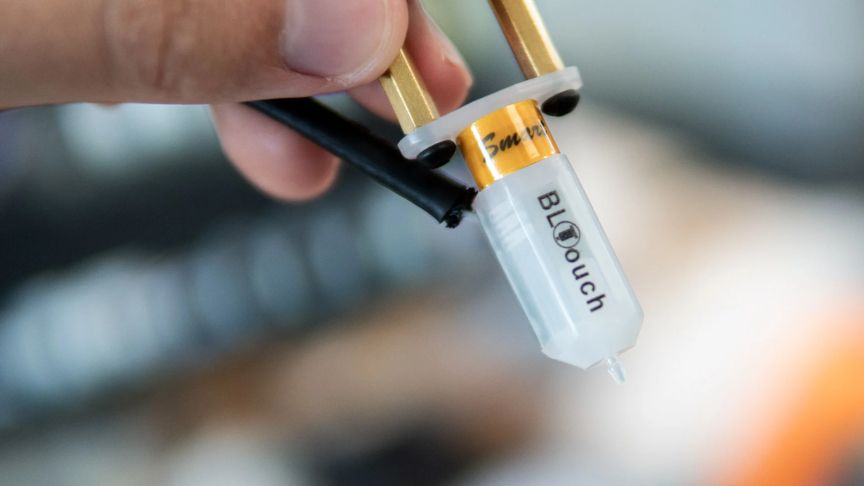
About six months ago, I got fed up with manually leveling my printer bed and ordered a BL Touch. Unfortunately, I didn't realize at the time of purchase that I needed a separate adapter chip for my Ender 3 Pro, and so it wasn't as "plug and play" as I had hoped. Thus, it sat on my shelf for many, many months gathering dust.
That is, until I learned about the SKR Mini E3, which promised a whole host of interesting features and improvements:
- Silent stepper motor drivers for very quiet prints
- 32 bit processor, which supports faster prints
- Support for full-color, touch screen displays
- Ability to flash firmware updates straight from the SD
- And, most importantly, out-the-box support for the BL Touch.
Installing the SKR Mini E3
This installation was mostly plug-and-play, and there's lots of good information out there. There are a couple notable "gotchas" I encountered that might save you some trouble:
- Make sure you print whatever mount you want for the BL Touch beforehand.
- Wire up the BL Touch during the installation.
- Leave the main motherboard plate screws undone until you've verified everything is working properly.
https://smile.amazon.com/BIGTREETECH-Control-TMC2209-Printer-Creality/dp/B08BZQ22XT/
Updating the Firmware
In order for the BL Touch to operate, you'll need to flash a new version of Marlin firmware. The SKR Mini makes flashing new firmware a breeze, however I still hit some snags with the actual firmware itself. If you head over to Bigtree Tech's GitHub, you'll find tons of good information for this process, including setting up your development environment.
Bigtree Tech offers some precompiled firmware on their GitHub page, including firmware for the BL Touch. Unfortunately, for me this precompiled software didn't work - there seemed to be a bug at the time of writing. I'd recommend flashing their version first, though, because your mileage may vary. If it doesn't work, you can see my changes below.
Customizing Firmware
First things first, you need to clone the BigTree Tech git repository and open the firmware project. For this, I recommend following their guide that utilizes VS Code and the PlatformIO plugin.
After pulling the project down and opening it in VS Code, I'd recommend just compiling to make sure everything is in order before making any changes. After that, all of the changes I had to make (and likely you) will be in the Configuration.h file. Here is what I did:
#define Z_MIN_PROBE_USES_Z_MIN_ENDSTOP_PIN
Uncomment the above line in Configuration.h to enable X-stop probing.
#define BLTOUCH
Uncomment this line to configure for the BL Touch.
#define NOZZLE_TO_PROBE_OFFSET {-40,-12, -1.65 }
Modify this line to specify where the probe is located. This will vary depending on your printer and what mount you're using. I printed my mount, which gave some suggestions on the mount offset. The parameters specified are X, Y and Z position. Note that while these are important, they are not critical and can be adjusted through the software later.
//#define AUTO_BED_LEVELING_3POINT
//#define AUTO_BED_LEVELING_LINEAR
#define AUTO_BED_LEVELING_BILINEAR
//#define AUTO_BED_LEVELING_UBL
//#define MESH_BED_LEVELING
Uncomment the AUTO_BED_LEVELING_BILINEAR macro, and comment out the MESH_BED_LEVELING macro. You can read more about these macros in the Marlin documentation.
#define GRID_MAX_POINTS_X 5
Update the number of grid points to use. The higher the number, the more accurate of a reading your probe can get. However, it also means a slower start up time for prints. The default is three, which means in the bilinear configuration it will probe a 3 x 3 grid of your bed - so a total of nine points. That's probably enough, but I prefer five.
#define Z_SAFE_HOMING
In essence, this option will cause homing to occur in the middle of your bed. By default, your printer probably goes to a far corner when it homes. This will cause issues if the probe ends up overhanging the bed itself, so we define safe homing which moves this home point to the center of the bed.
Flashing Firmware
After you have a compiled firmware, flashing it is super simple. Just put the binary on an SD card and rename it to firmware.bin. The insert the SD card into your 3D printer and turn it on. The SKR Mini E3 should notice the new firmware file, flash it and rename the file to firmware.cur. You can validate that flashing went correctly by navigating in the menu to "About Printer" and then "Printer Info" to check the firmware version.

Setting up BL Touch
Once the BL Touch is mounted and wired up, you just need to validate it works. When you first start up the 3D printer, the BL touch should enter an auto-test mode where it extends and retracts the probe a few times. It will end this test with a retracted probe and glow red with a small, solid blue indicator light. If this did not happen, double check your wiring.
Disable Manual Z-Stop
You have very likely done this already with your wiring, but I wanted to make a special call out to make sure your normal Z-Stop wiring is not connected and that the Z-Stop trigger on your printer is disconnected.
Testing the Probe
Manually (through the software) move your printer head up on the Z axis to allow plenty of empty space. Next, issue the command to auto-home, which should first home on the X and Y axis.
After these, it will move to the center of the bed and begin homing on the Z axis (i.e. lowering towards the bed). When it does this, you should notice that the BL Touch probe extends and the light turns off in preparation. If you do not notice this, cut the power to the printer. You could have a problem with the firmware, or the BL Touch itself.
Assuming the BL Touch probe extends and the printer head starts lowering towards the build plate, reach out and allow the BL Touch probe to press against your finger. When doing so, it should retract and the print head should immediately stop. If you do not notice this, cut the power to the printer. You could have a problem with the firmware, or the BL Touch itself.
Calibrating The Z-Offset
While this was set in the firmware, you will very likely need to configure it for your exact setup. There is a great video by 3DMN that can show you how to do this.
Configuring Your Slicer
The next step is to configure your slicer to add the gcode necessary to enable probing. It is important that you do not try and print any older gcode print files you have laying around! You will want to configure your slicer to add some custom gcode to the beginning of every print. In Cura, this can be done by going to Settings > Printer > Manage Printers. Find the printer profile you use (likely the only one listed) and select it, then click "Machine Settings." In the "Start G-code" section, you can add the gcode needed. The full start code I use is modified from Reddit and seen below:
M201 X500.00 Y500.00 Z100.00 E5000.00 ;Setup machine max acceleration
M203 X500.00 Y500.00 Z10.00 E50.00 ;Setup machine max feedrate
M204 P500.00 R1000.00 T500.00 ;Setup Print/Retract/Travel acceleration
M205 X8.00 Y8.00 Z0.40 E5.00 ;Setup Jerk
M220 S100 ;Reset Feedrate
M221 S100 ;Reset Flowrate

; Ender 3 Custom Start G-code
M140 S{material_bed_temperature_layer_0} ; Set Heat Bed temperature
M190 S{material_bed_temperature_layer_0} ; Wait for Heat Bed temperature
M104 S160; start warming extruder to 160
G28 ; Home all axes
G29 ; Auto bed-level (BL-Touch)
G92 E0 ; Reset Extruder
M104 S{material_print_temperature_layer_0} ; Set Extruder temperature
G1 X0.1 Y20 Z0.3 F5000.0 ; Move to start position
M109 S{material_print_temperature_layer_0} ; Wait for Extruder temperature
; G1 Z2.0 F3000 ; Move Z Axis up little to prevent scratching of Heat Bed
G1 X0.1 Y200.0 Z0.3 F1500.0 E15 ; Draw the first line
G1 X0.4 Y200.0 Z0.3 F5000.0 ; Move to side a little
G1 X0.4 Y20 Z0.3 F1500.0 E30 ; Draw the second line
G92 E0 ; Reset Extruder
G1 Z2.0 F3000 ; Move Z Axis up little to prevent scratching of Heat Bed
; End of custom start GCode
This code is pretty well documented, but if you're curious more about the exact commands you can cross-reference with the gcode documentation.

Printing
If everything above checks out, then restart the printer and fire up a printing project. Make sure it has the start gcode outlined above. The first thing that should happen is the bed heating, and then the BL Touch bilinear probing will start. Make sure to keep a close eye on this. If something goes wrong, the printer head will crash into the build plate, possibly ruining the plate and the nozzle. If this happens, cut the power to the printer as soon as possible!
Conclusion
You can easily upgrade your printer to operate nearly silently, have auto bed leveling, thermal runaway protection, updated firmware and better support for future enhancements. And all of this you can get for around $65 USD and installed in an afternoon. These kinds of upgrades are what take the Ender 3 from a really good entry-level printer to being able to compete with something double the cost. Plus, you'll learn a lot about you printer, from the hardware to the software. Happy printing!
